Open topic with navigation
Using Scheduled Price Changes
Introduction
The Scheduled Price Changes function can be used to schedule Sell Price Changes to occur automatically for a future date and time.
The function supports changing Sell Prices of one or more Price Levels and Prices can be set manually, or they can be easily updated using a Price Calculator that's built into this function.
To access the Scheduled Price Changes function, go to: Back Office > Files > Sales > Scheduled Price Changes.
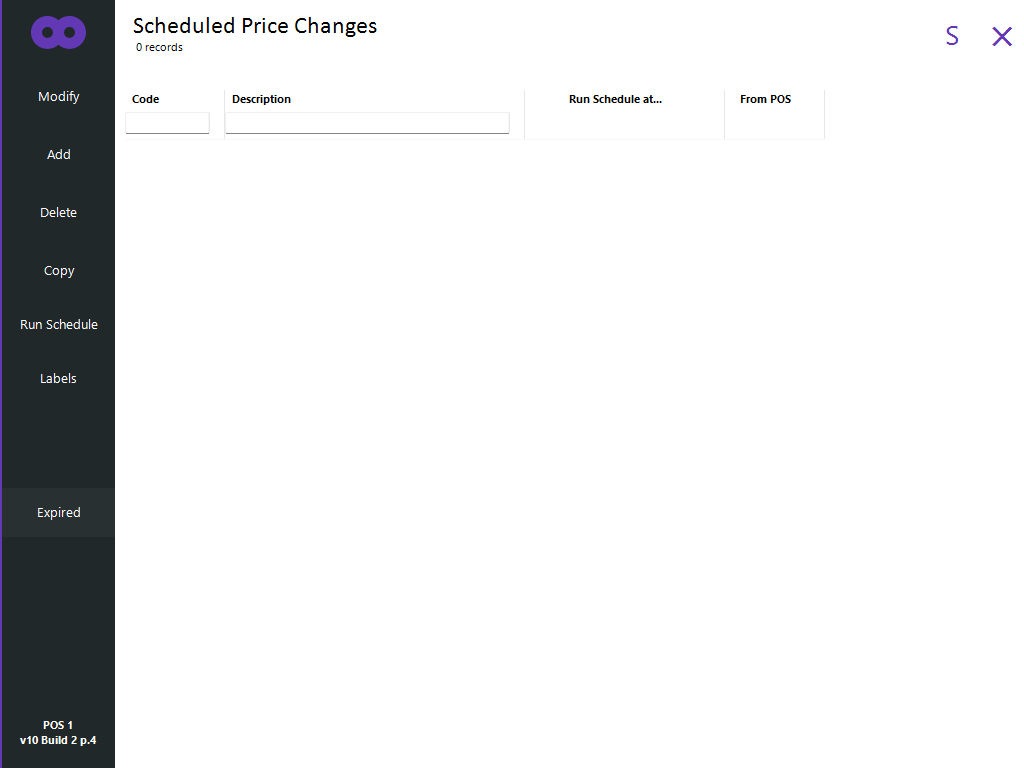
The main Scheduled Price Changes window contains the following options:
- Modify - This will modify the currently selected Schedule Price Change batch.
- Add - This will add a new Scheduled Price Change batch.
- Delete - This will delete the currently selected Scheduled Price Change batch.
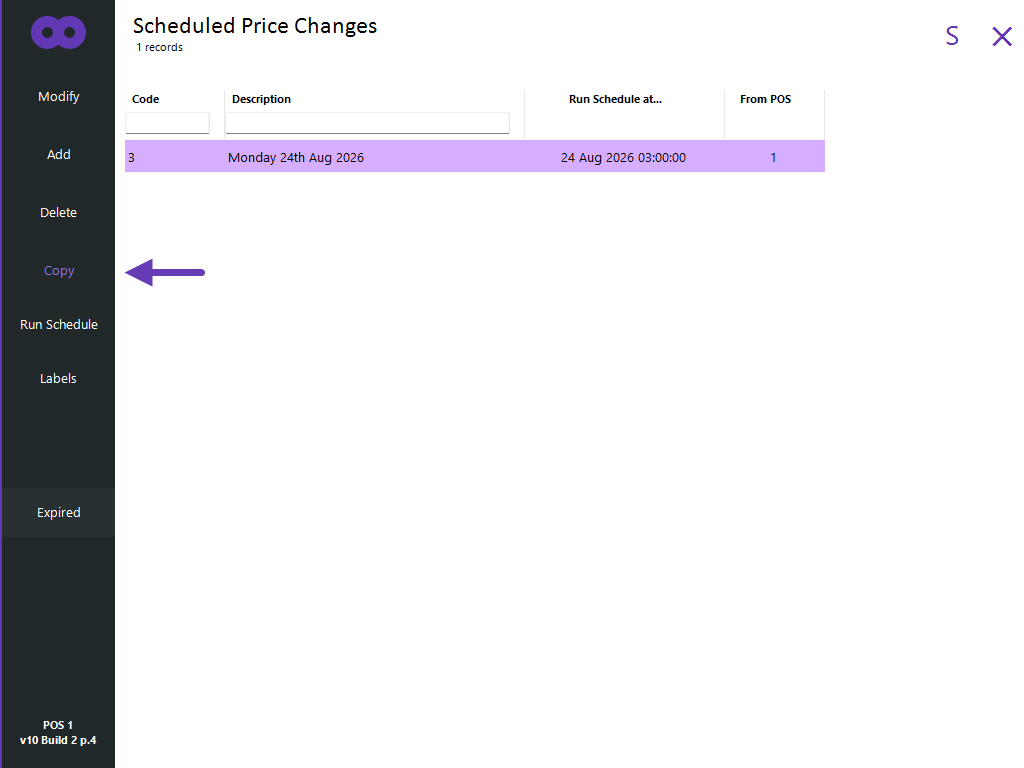
- Copy - This will copy the currently selected Scheduled Price Change batch.
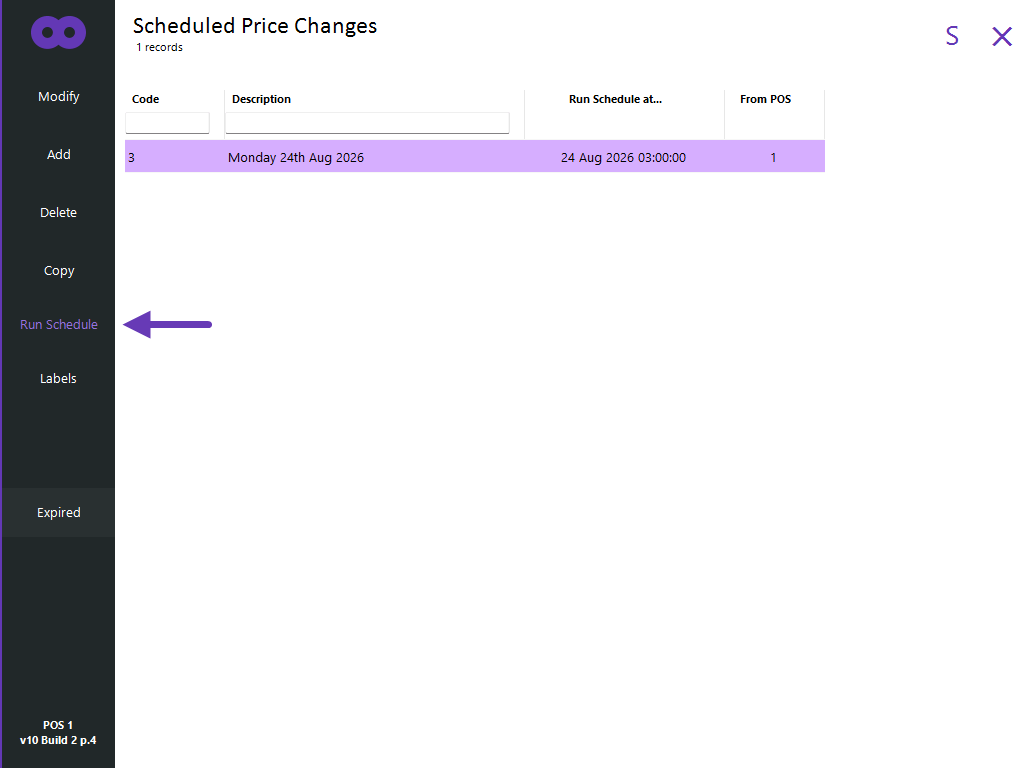
- Run Schedule - This will run the currently selected Scheduled Price Change batch.
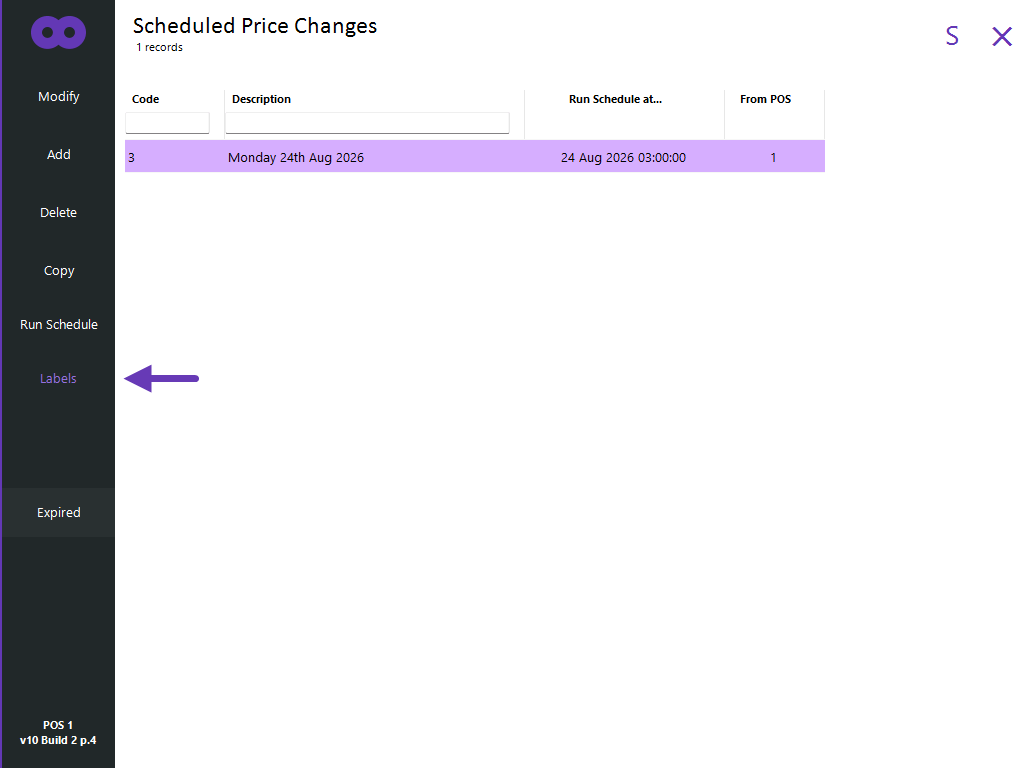
- Labels - This will print labels for the currently selected Scheduled Price Change batch.
- Expired - This button will show a list of Expired Scheduled Price Change batches. Expired Schedules include Scheduled Price Change batches that have already run or Scheduled Price Change batches that have a "Run Schedule at date" that occurs before the current date and time.
Add/Modify a Scheduled Price Change batch
Go to: Back Office > File > Sales > Scheduled Price Changes > Add/Modify.
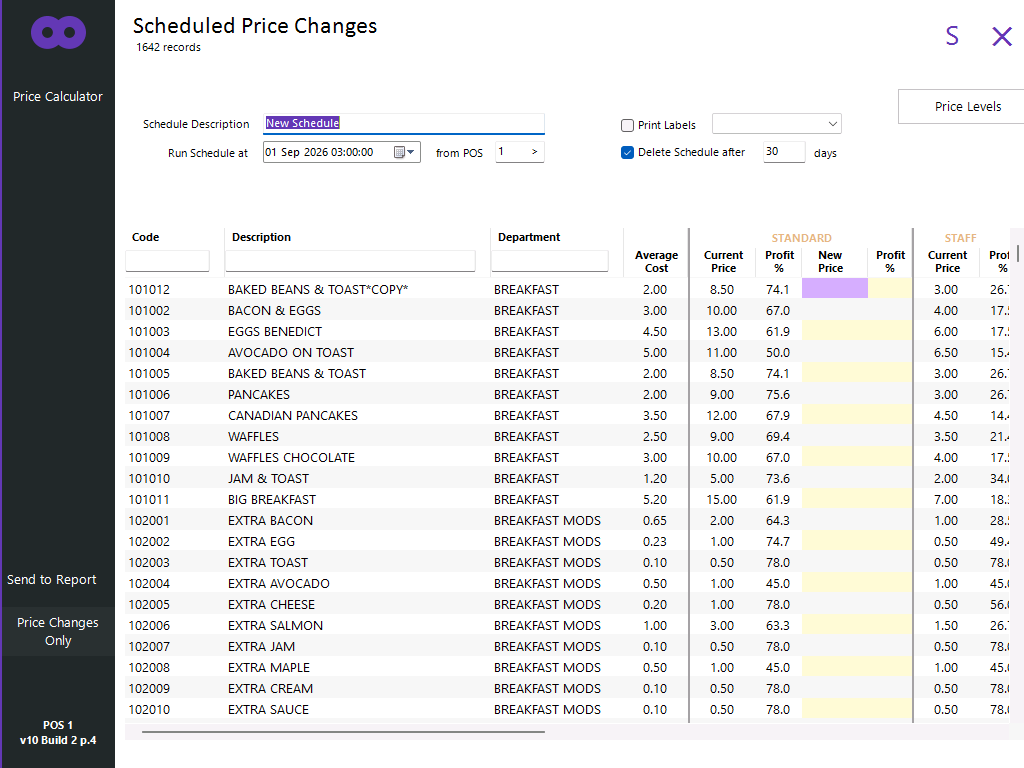
A window will be displayed with the following options:
- Schedule Description - Enter a Description for the Scheduled Price Change batch. The Default Schedule Description is "New Schedule".
- Run Schedule at - This is the date and time when the schedule will run.
- From POS - This is the POS Terminal from which the schedule will be run from.
Note!
For the Schedule to run, the POS Terminals must be turned on at the date and time specified in the "Run Schedule at" field.
- Print Labels - If Labels are required for items that are having their Sell Prices changed, enable this option and select the default Label Style to use. The labels will be printed automatically at the time the Scheduled Price Changes run.
Note 1 - The Labels will be printed automatically at the POS Terminal that has been selected in the "from POS" field.
Note 2 - When enabling the Labels option in the Schedule, the Labels will only be printed using one Price Level (whichever Price Level has been set in the Label Format will be the Price Level that's used to print the labels).
If Labels are required for other Price Levels, they will need to be printed manually by selecting the Scheduled Price Change batch from the Scheduled Price Changes window > Labels > Select the required Price Level in the Labels window > Print.
Tip!
If there are no label styles available in the dropdown box, they can be created by going to:
Back Office > Utilities > Labels, choose the desired options for the Label Format, then next to the "Save Format As" button, enter a description for the label format, then press "Save Format As".
The saved format will be available when enabling the Print Labels option for the Scheduled Price Changes.
- Delete Schedule after # days - This option specifies whether the Schedule will be deleted and if so, how many days it will be deleted after the schedule has run.
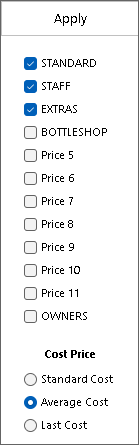
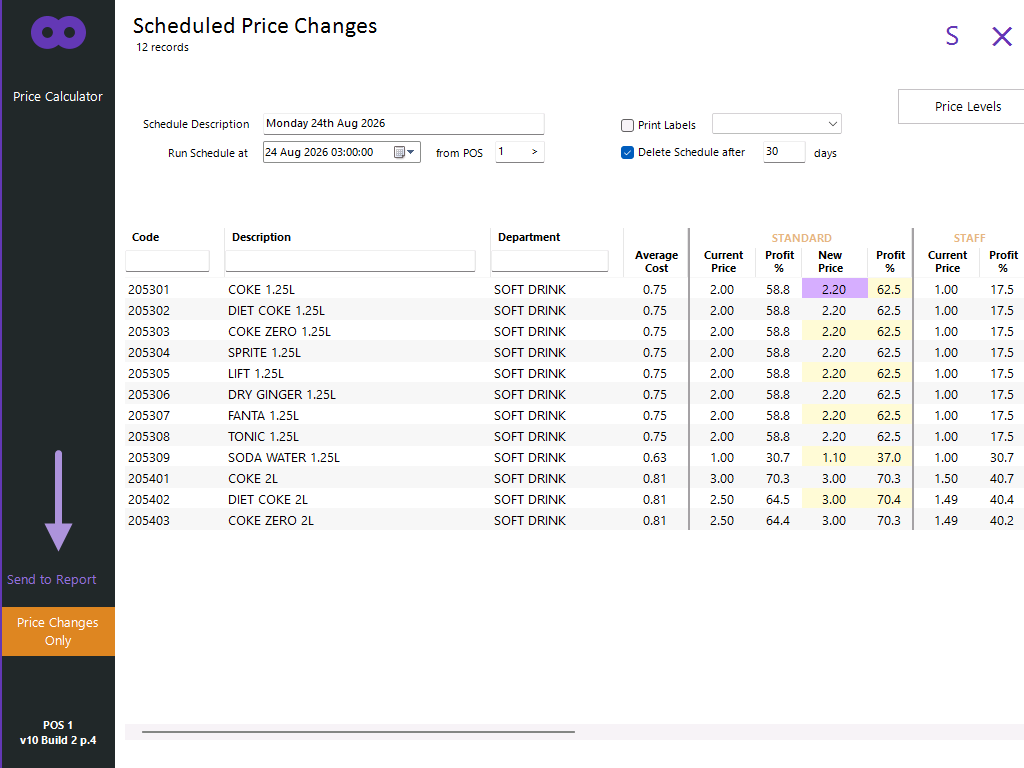
- Price Levels button - This button can be used to choose which Price Levels are going to be displayed in the Stock Items grid, thereby enabling New Sell Prices to be entered for the selected Price Levels.
The button also enables the Cost Price Type to be selected (e.g. Standard Cost, Average Costs, Last Cost).
The selected Cost Price Type will be shown in the Scheduled Price Changes Stock Item grid.
After the desired options have been selected, press the "Apply" button.
- Price Calculator - This button will display the Price Calculator function which can be used to calculate and set New Sell Prices. For more information, refer to the section below Setting New Sell Prices via the Price Calculator.
- Send to Report - This button can be used to produce a report of the items that are displayed in the Scheduled Price Change.
Note that all Stock Items currently shown in the Scheduled Price Changes grid will be included in the Report. If only the Stock Items that have a New Sell Price are required, ensure that the "Price Changes Only" button is pressed prior to pressing the "Send to Report" button.
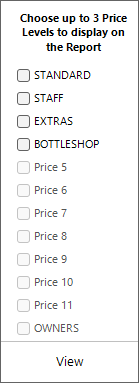
Also note that the report supports a maximum of three Price Levels. If more than three Price Levels have been enabled, the report will display a prompt to select the desired three Price Levels to include in the report.
- Price Changes Only - This button can be used to filter the Stock Items in the Scheduled Price Changes so that only the Stock Items that have a Price Change will be displayed. This button is particularly useful when used together with the "Send to Report" button.
Manually Entering New Sell Prices
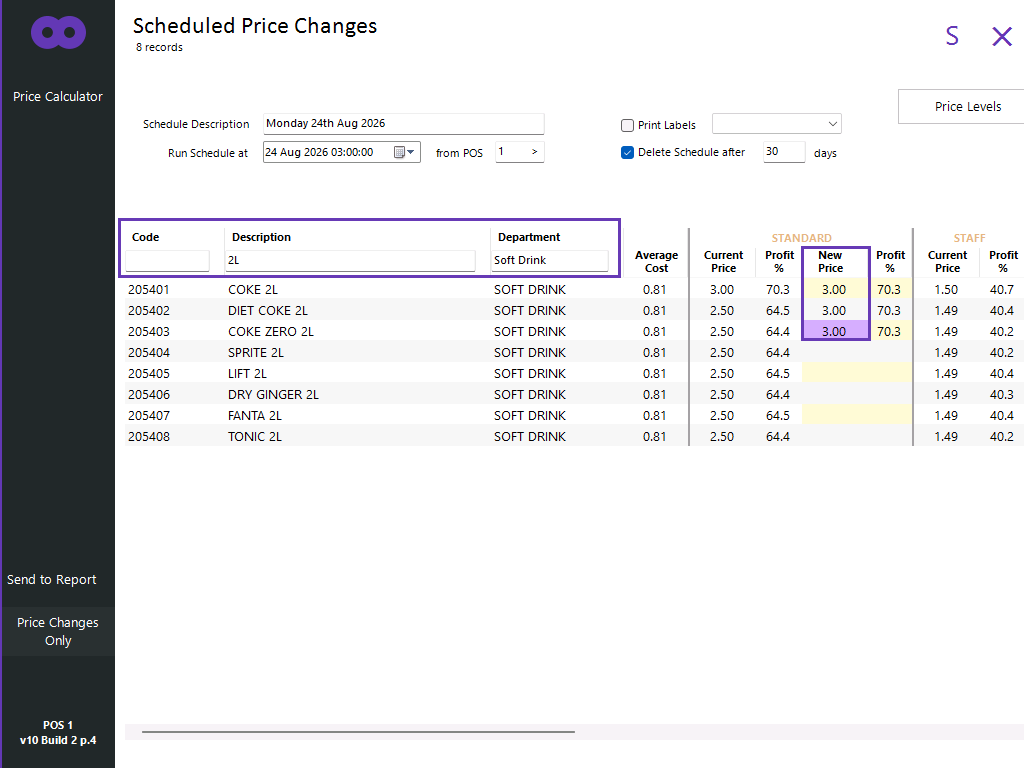
To manually set New Sell Prices for Stock Items, search for the Stock Item in the Stock Items grid and enter a new Sell Price in the New Price field for the desired Price Level.
Items shown can be searched via the column headers in the grid and new prices can be set via the New Price fields as shown below.
Within the New Price column for the desired Price Level, enter the New Price and repeat for each item that needs a New Sell Price.
Note that if additional Price Levels have been enabled, they might not be visible. Scroll to the right to display additional Price Levels.
Also note that additional Price Levels can be enabled by pressing the Price Levels button on the top-right corner.
Setting New Sell Prices via the Price Calculator
The Price Calculator function can be used to calculate and set New Sell Prices.
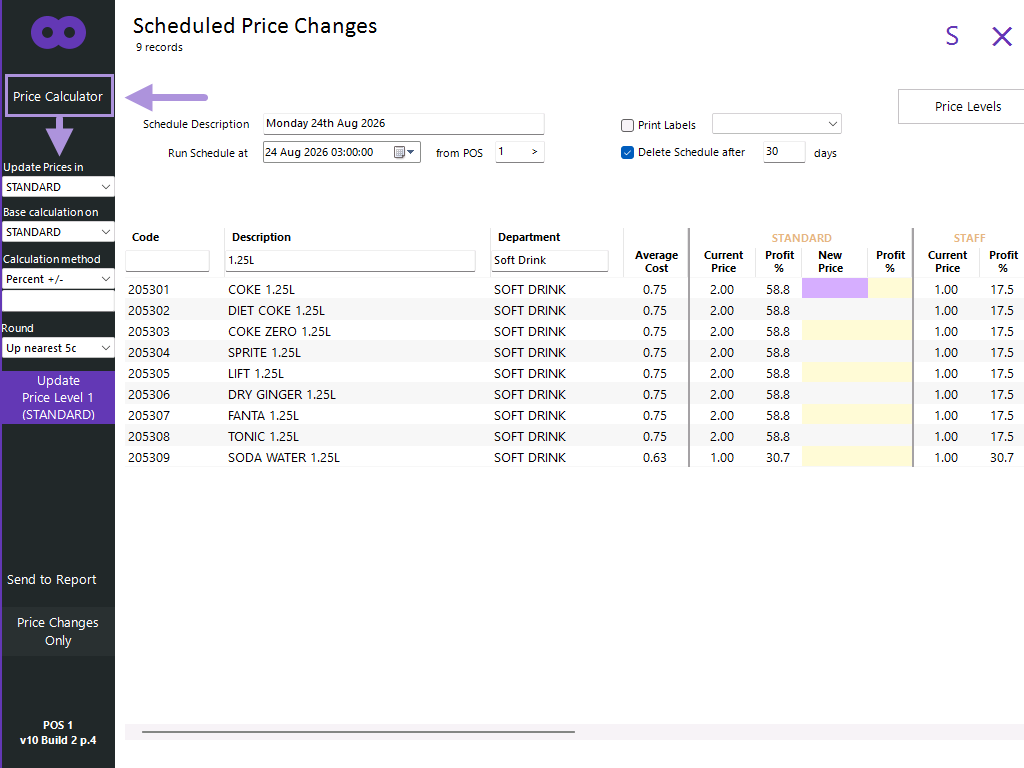
Press the "Price Calculator" button on the top-left corner of the Scheduled Price Changes window.
Note!
The Price Calculator will calculate and set New Sell Prices for all the Stock Items that are currently visible in the grid.
Therefore, if all Stock Items are displayed and there's no filter set, then the Price Calculator will set a New Sell Price for all Stock Items that are shown in the grid.
If only some items are shown in the grid (by entering search terms via the column headers), then only those filtered/visible items will have their New Sell Prices set via the Price Calculator.
The Price Calculator contains the following options which can be used to calculate and set New Sell Prices:
- Update Prices In - This dropdown box is used to select which Price Level will be updated by the Price Calculator. Any calculated prices will be entered into the New Price field for the selected Price Level and t hose prices will be applied when the Scheduled Price Change is run either automatically at the specified date/time or manually via the "Run Schedule" button.
- Base Calculation on - This dropdown box is used to select which Price Level the calculation will be based on and contains the following options:
- Price Levels 1 to 12 - Select a Price Level from 1 to 12 to base the calculation on.
- Price Level 1-new to Price Level 12-new - Selecting a Price Level that has the "-new" option appended onto the end refers to the New Sell Price that has been entered for the selected Price Level.
- Standard Cost - Select Standard Cost to base the calculation off the current Standard Cost.
- Average Cost - Select Average Cost to base the calculation off the current Average Cost.
- Last Cost - Select Last Cost to base the calculation off the Last Cost.
- Clear Prices - Select Clear Prices to clear the Prices from the Price Level that has been selected in the "Update Prices In" dropdown box. Note that the Prices will only be cleared when the Clear Prices option is selected and the "Update Price Level #" button has been pressed. A confirmation prompt will also appear to confirm the clearing of Prices from the selected Price Level.
- Calculation Method - This dropdown box will enable the selection of the Calculation Method that will be used to calculate the New Sell Prices. The following Calculation Methods are available:
- Percent +/- - This option will calculate the new Sell Price as a Percent increase/decrease using the value entered below this dropdown box.
- Dollar +/- - This option will calculate the new Sell Price as a Dollar increase/decrease using the value entered below this dropdown box.
- Profit Margin - This option will calculate the new Sell Price as a Profit Margin using the value entered below this dropdown box.
- Calculation Method value - This is a blank field that's displayed below the Calculation Method. The value entered in this field will be used to calculate the new Sell Price. E.g. Selecting Percent +/- in the Calculation Method field above and entering 5 into this field will calculate the New Sell Price as a 5% increase on the Base Calculation on.
- Round - This dropdown box controls what type of rounding will be used on the final calculated Sell Price. The available options are:
- Up nearest 5c
- Up nearest 10c
- Up nearest 50c
- Down nearest 5c
- Down nearest 10c
- Down nearest 50c
- Update Price Level # - This button will show the Price Level that has been selected in the "Update Prices In" option and pressing this button will trigger the Price Level to be updated using the selected calculation options.
Each of the above options are shown below:
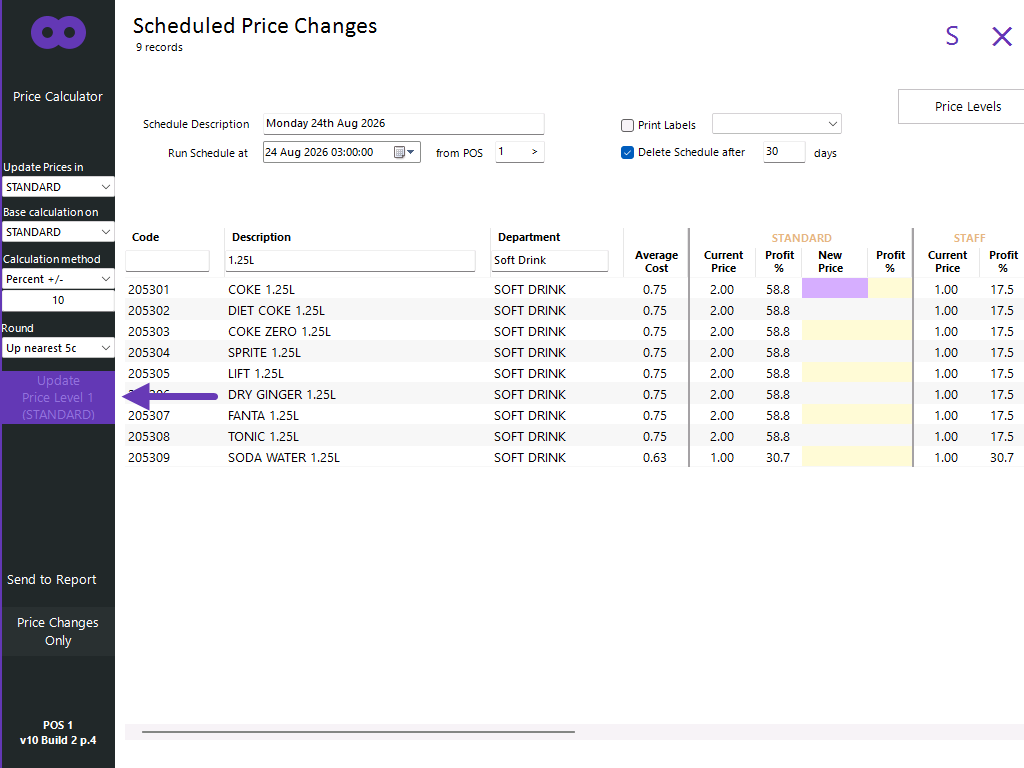
To demonstrate this function, the Price Calculator has been set as per the following screenshot.
Update Prices In: STANDARD (Price Level 1)
Base calculation on: STANDARD (Price Level 1)
Calculation method: Percent +/-
Calculation value: 10
Round: Up nearest 5c
Press the "Update Price Level 1 (STANDARD)" button to update the New Price for that Price Level using the options in the Price Calculator.
A confirmation prompt is displayed.
Press "Yes" to continue.
After pressing "Yes", another prompt is displayed that will confirm that the prices have been updated.
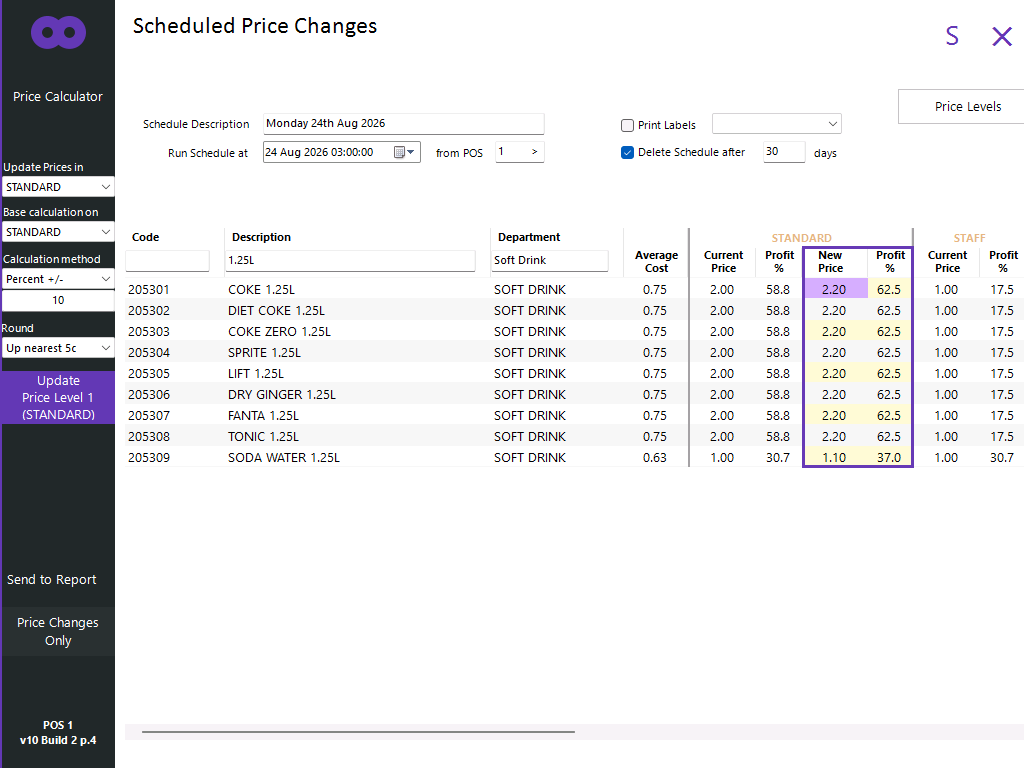
The New Prices for the Stock Items will be populated.
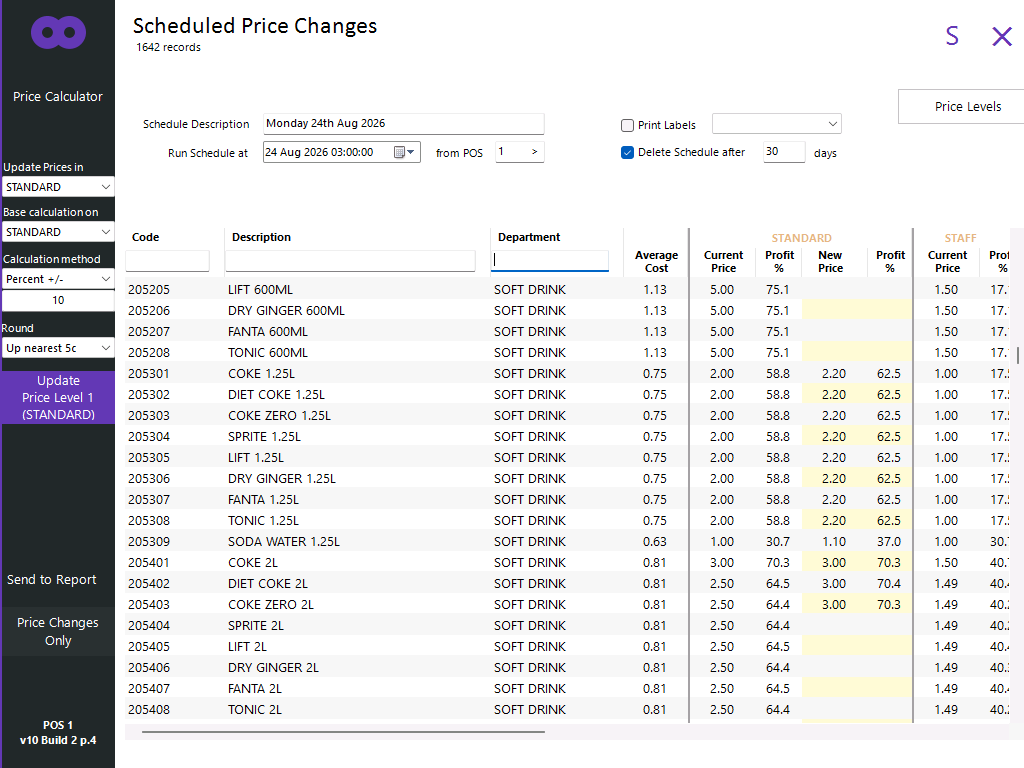
Note that as mentioned above, only the items that were filtered will have their New Prices updated.
When the filters are cleared, all the Stock Items will be displayed.
Any other Stock Items that weren't included in the filter when the Price Calculator was used will retain their previously entered New Prices or blank New Prices.
Send to Report
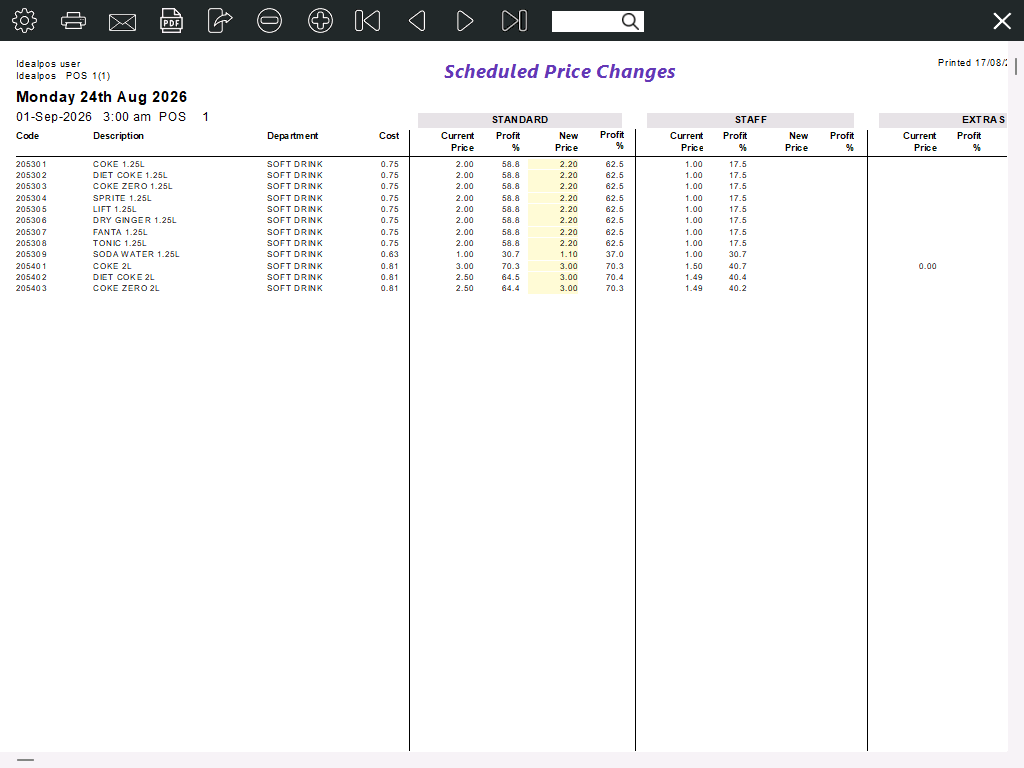
The Send to Report button can be used to produce a report of all the items.
Note that the "Send to Report" function will include all the Stock Items that are currently displayed in the grid.
Therefore, if wanting to report only on the Stock Items that have Price Changes, ensure that the "Price Changes Only" button is pressed prior to pressing the "Send to Report" button.
Also note that the report will allow a maximum of three Price Levels to be displayed.
If more than three Price Levels have been selected via the Price Levels button (on the top-right corner of the Scheduled Price Changes window), then the following prompt will be displayed when pressing the "Send to Report" button.
In the prompt, select the three Price Levels to display on the Report, then press the "View" button.
The Scheduled Price Changes are displayed in a report format which can be printed, emailed, saved to PDF or exported.
Delete a Scheduled Price Change batch
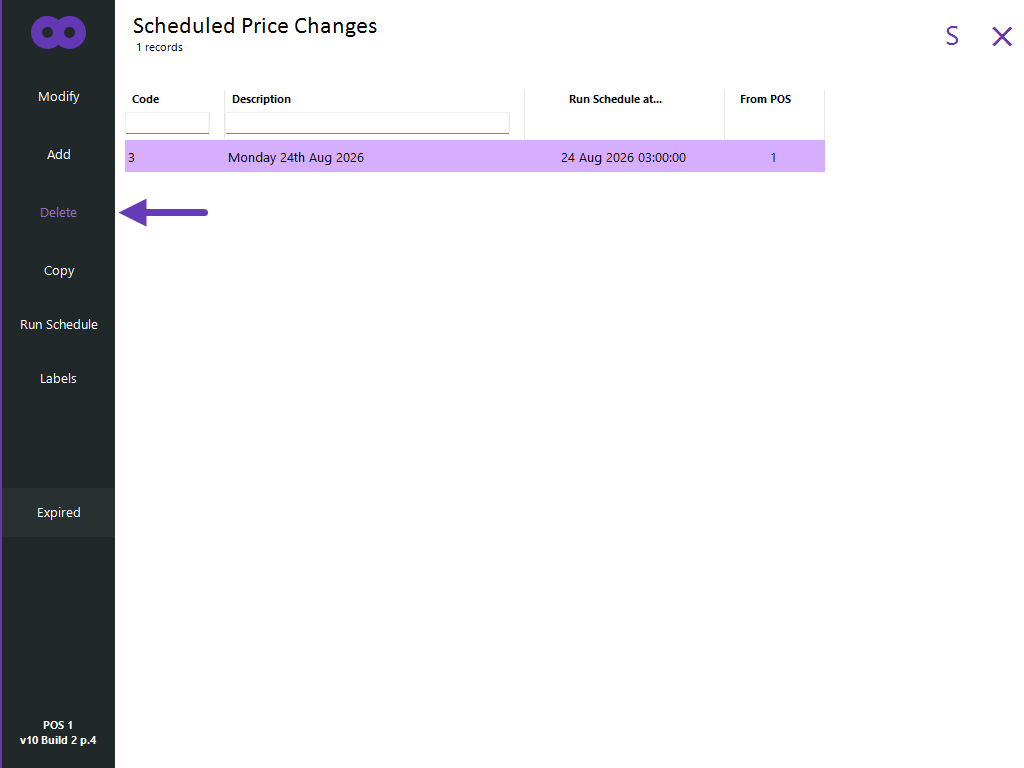
To delete a Scheduled Price Change batch, select the desired Scheduled Price Change batch from the list and press the "Delete" button.
A confirmation prompt will be displayed.
Press "Yes" to continue and delete the batch.
Note that deleting a Scheduled Price Change batch will prevent it from running and all the New Sell Prices that have been entered will be cleared.
Also note that Scheduled Price Change batches can be set to auto delete # days after the scheduled date/time that has been set in the Scheduled Price Change batch.
Copy a Scheduled Price Change batch
To copy a Scheduled Price Change batch, select the desired Scheduled Price Change batch from the list and press the "Copy" button.
After pressing "Copy", a confirmation prompt is displayed.
Press "Yes" to copy the schedule.
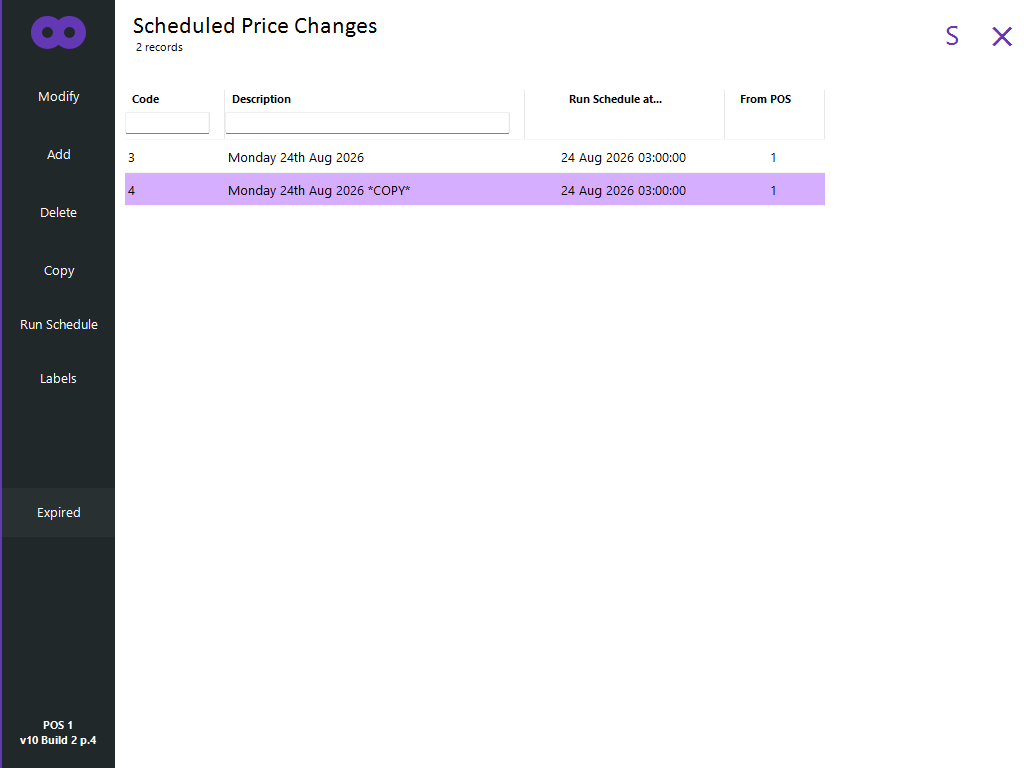
A new Schedule is created using the original schedule's description with *COPY* appended onto the end of the Description name.
Run Schedule
To run a Scheduled Price Change batch, select the desired Scheduled Price Change batch from the list and press the "Run" button.
Note that running the schedule manually will trigger the Price Changes in the batch to be applied immediately and the new Sell Prices will be sent to all networked Terminals/Back Offices.
After pressing "Run Schedule", a confirmation prompt is displayed.
Press "Yes" to run the Schedule.
A prompt will be displayed to confirm that the Price Changes have been completed.
If required, it is also possible to run an expired Schedule that hasn't been deleted yet; Press the "Expired" button to show a list of expired Schedules, select the Expired Schedule, then press the "Run Schedule" button.
Labels
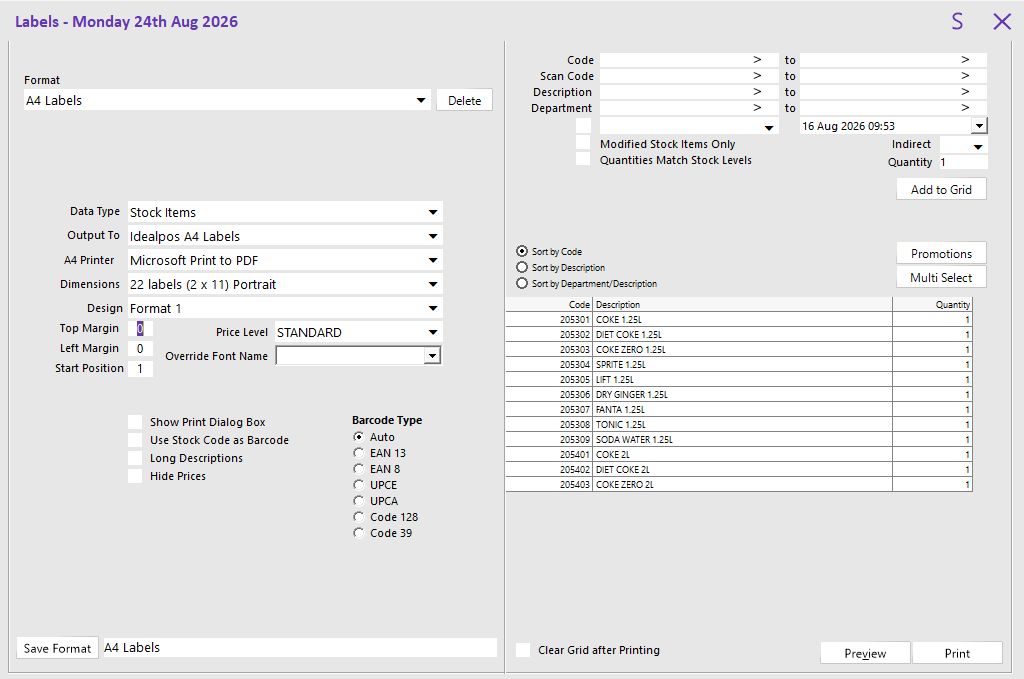
To print Labels for all the Stock Items that are included in a Scheduled Price Change batch, select the desired Scheduled Price Change batch, then press the "Labels" button.
The Labels function will be displayed and all the Stock Items from the Scheduled Price Change will be listed, ready to have labels printed.
Note!
The Scheduled Price Changes function can update Sell Prices for multiple Price Levels, but the Labels function can only print Labels for one Price Level at a time.
E.g. Labels for Price Level 1 will need to be printed first, then print Labels for Price Level 2 and repeat until the labels for all the required Price Levels have been printed.
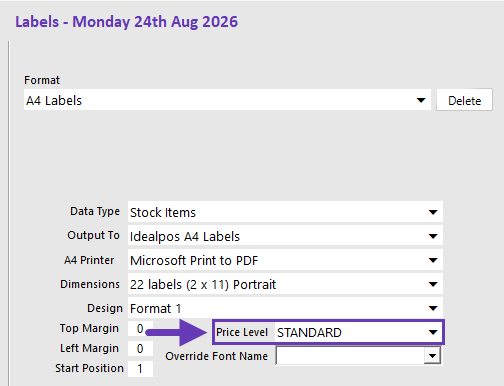
Therefore, ensure that the required Price Level has been selected from the Price Level dropdown box prior to printing Labels.
When labels are printed automatically as part of the schedule, they will be printed using the Price Level that has been set in the Price Level field shown below.
Open topic with navigation